In this article, we'll show you how to add (pin) and remove (unpin) any application from the Windows 8 or Windows 8.1 Metro Start Screen. Tiles or the small squares and rectangles appearing on the Windows 8 Metro Start Screen, represent different programs that you can access by either tapping or clicking on them. The Windows Metro Start screen contains its default tiles, however users have the ability to add or remove tiles (application shortcuts) to meet their requirements. Adding tiles to the Metro Start screen is called pinning while removing them from the Metro Start screenis called unpinning.
Pinning Apps and Programs to the Windows 8 Metro Start Screen
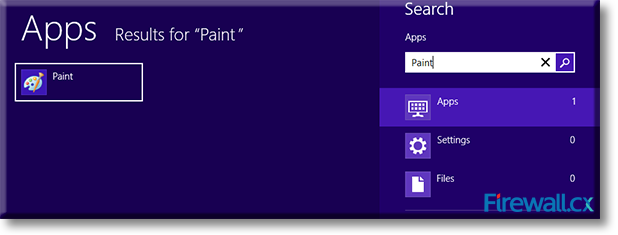
To pin a Windows application or a Metro App to the Start screen, you have to find it first. For this, tap/click on the Search icon and type the name of the application or the program that you wish to add.
For example, type “Paint” to search for the Windows Paint application as shown below. Once found tap/click on the Apps option:

Figure 1. Searching for Application
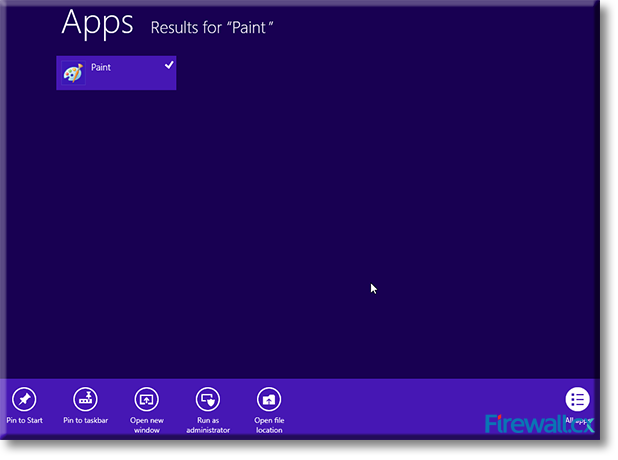
Search will come up with the search result for the Paint program, as indicated on the left of the screen. Right-click on the search result or hold your finger on it until a check mark appears besides it and a panel opens up at the bottom of the screen:

Figure 2. Pinning the Application on Windows 8
The Panel offers two options for pinning – Pin to taskbar and Pin to Start. If you like to see the icon of the application on the taskbar on your Windows Desktop, you can tap/click on Pin to taskbar. We want to pin it to the Metro Start screen so Tap/click on the icon Pin to Start, for this article.
The bottom panel now disappears and you can open the application from the icon on the screen. Instead if you would like to go back to the Start screen, click on the bottom left hand corner or swipe in from the right edge of the screen. Now, tap/click on the Start icon. Verify that the application icon has appeared on the Metro Start screen: